Summary: OST files are Outlook data file that provides you the facility to avail mailbox items offline. At times, users need to change the location of OST files to manage storage space and increase their efficiency. Therefore, the article highlights the reasons and practical solutions to do so. However, check out Kernel for OST to PST converter tool to recover data from inaccessible OST files.
In the MS Outlook application, an OST file (Offline Storage Table) plays a key role in safekeeping email messages, contacts, notes, calendars, and other mailbox items. It saves at a default location and allows you to access the mailbox offline. Outlook allows you to add multiple accounts and each account will have its data file. As a result, there can be multiple OST files at the same location containing each account’s mailbox.
For an Exchange account, the size of the OST file is not a concern on a server, but due to the limited space of a hard disk drive, users need to move the OST file location. Therefore, in this article, we will discuss the multiple methods to change the OST file location manually without altering the original setting of the associated Outlook account.
Instant Solution
Try an automated tool Kernel for OST to PST Converter to get back all data and restore the original mail from the crashed Exchange server.
When using Outlook with an Exchange account, your mailbox and other data reside on the Exchange Server. If you enable the Cached Exchange Mode, you can access the mailbox items even when Outlook is not connected to the server. To locate the OST file, check out the default locations of the OST files.
drive:\Documents and Settings\\Local Settings\Application Data\Microsoft\Outlook.
Reasons to move OST files to different location
Here are 4 key reasons why relocating your OST file can significantly benefit your system:
Improve system performance: When the operating system and applications running on a drive consume too much space, which slows down the application. As you change Outlook data file location, it can free up space on the drive and improve system performance.
Easy backup and restore: It’s crucial to maintain regular backups of essential files to avoid data loss. When you change Outlook OST file location, it becomes easy to back up and restore data.
Recovery from a system failure: In case of an unfortunate event like a hardware failure or system crash, a well-planned Outlook change OST location procedure can prevent data loss and make recovery easier.
Reduce the risk of file corruption: When the OST file is saved on the same drive as the operating system and applications, the risk of file corruption increases due to disk errors. So, changing the OST file location reduces the risk of file corruption and ensures data integrity.
Methods to Change the default Outlook OST file location
Following significant methods change OST file location in the right way.
Create a new Outlook Profile and move the existing OST file to a new location
Disable the Cached Exchange mode and configure a new location for the OST
Set ForcePSTPath Registry Entry
Using the Symbolic Links
We will discuss all the workarounds to relocate OST files in a detailed manner.
Method 1: Create a new Outlook profile and move the existing OST file to a new location
Creating a new Outlook profile provides you bug-free and fresh start while moving the existing OST file reduces the risk of file corruption. Follow the instructions given to perform the same.
Locate the existing OST file and copy and paste it to the new location.
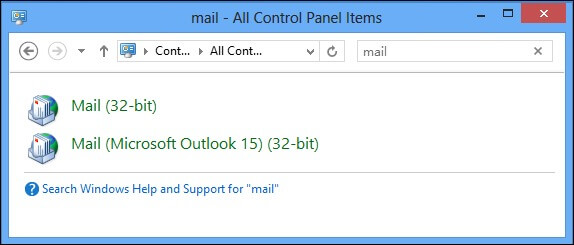
Launch the Control Panel and select the Mail option.
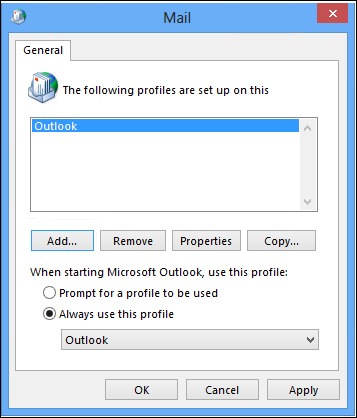
Click on the Show Profiles button.
Tap on the Add button and create a new profile.
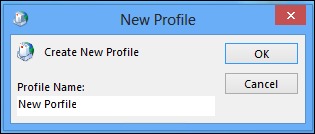
Enter a new Profile name and click OK.
In the next window, enter the credentials of your email account with which you want to create a new Outlook profile. Then, click Next.
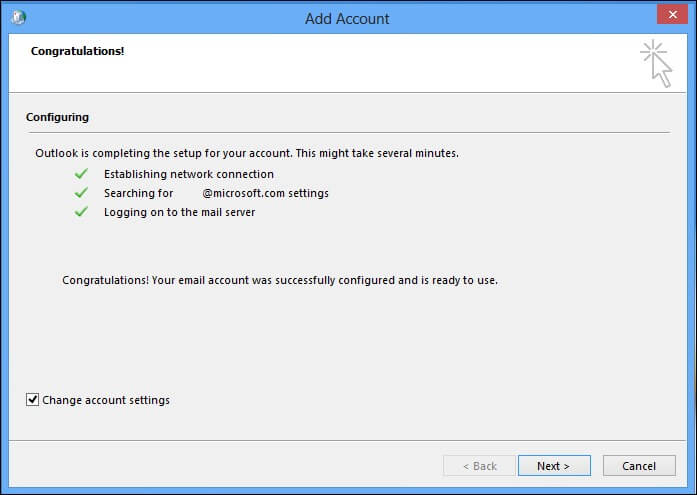
Once Outlook finishes configuring your new email account, check the Change account settings and click Next.
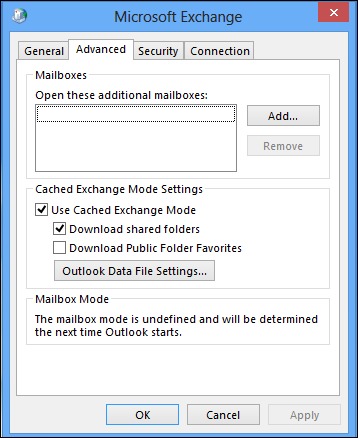
In the next window, i.e., Server Settings, click on the More Settings option.
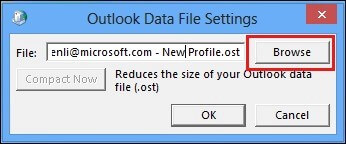
Go to the Advanced tab and click on Outlook Data File Settings.
Browse the location where you have moved your existing (OST). file
Click Finish to complete the process.
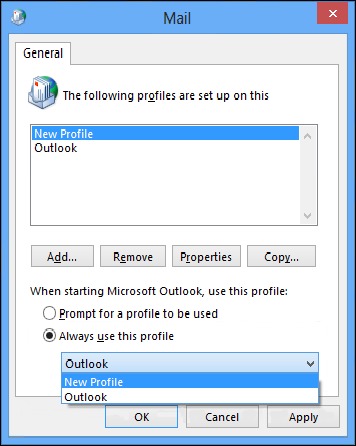
Once all the process will done, go back to the Control panel and select Mail again.
Click on the Always use this profile radio button, and from the drop-down list, select the New Profile.
Click Apply to save the changes.
Method 2: Disable the Cached Exchange Mode and change OST file location
It involves disabling the Cached Exchange Mode, configuring a new location for the OST file, and re-enabling the Cached Exchange Mode. As a result, a new OST file is created in the newly configured location. The new file will download all the mailbox data from Exchange data automatically.
Note: If you have Outlook 2010, you can refer the below steps to perform the same:
Open Outlook go to the File >Account Settings > Account Settings > Data Files options (alternately, in your system, go to Control Panel, double-click Mail, and click Data Files).
Choose your account and click Settings.
Note: Here, you can check out the present location of the OST file if you don’t know it.
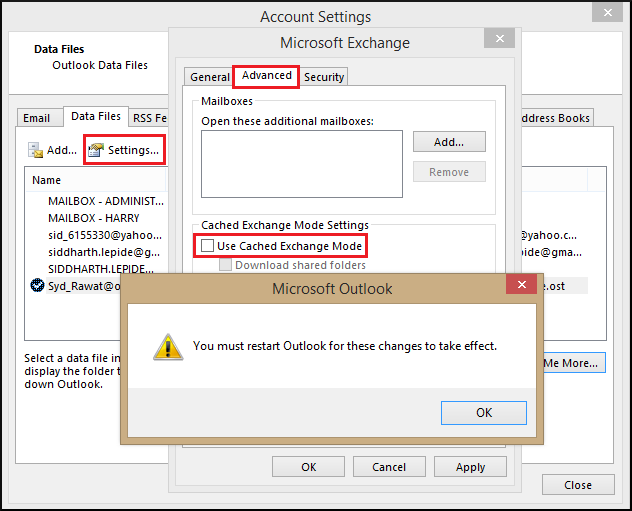
Go to the Advanced tab, uncheck the Use Cached Exchange Mode, and click OK.
Now again, click Settings, and go to the Advanced tab. After that, click Outlook Data File Settings > Disable Offline Use > Yes.
Choose Outlook Data File Settings again and browse for the new folder location of the OST file. Click Open; click OK. Note: If you want to move an old OST file to the above location, first copy that OST file to the new location, and then open it.
Again, on the Advanced tab, check the Use Cached Exchange Mode checkbox; click OK.
Finally, close all the open dialog boxes and click OK.
Method 3: Set ForcePSTPath Registry Entry
A Windows Registry Key ForcePSTPath can be used to change the OST file location. It is available on all Outlook versions, including 2019, 2016, 2013, 2010, 2007, & 2003.
Follow the given steps to change the location of an OST file using the ForcePSTPath key.
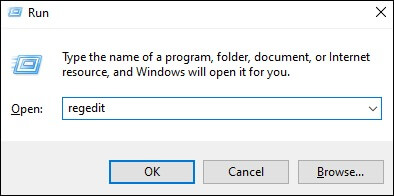
Press the Windows + R key at once. Type regedit in the Run window & hit Enter.
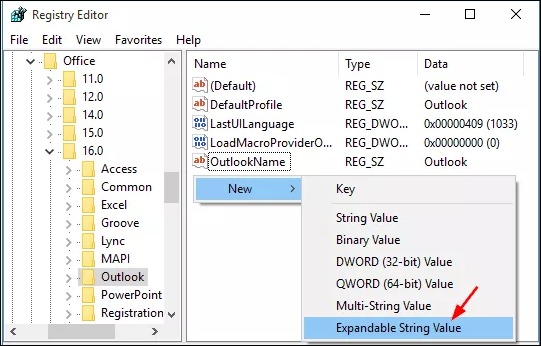
A Registry Editor window appears. Use the appropriate keys according to your version of Outlook.
Right-click on an empty area of the Registry Editor in the right-hand pane. Click on New & navigate to Expandable String Value.
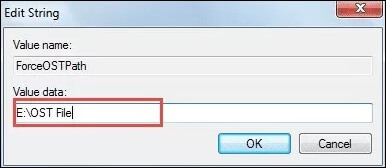
Add ForceOSTPath to the Value name and set the new default location in the Value Data box. Press OK.
Restart MS Outlook after closing Registry Editor. A new OST file is automatically created in the default directory if you create a new Exchange account.
Method 4: Using the Symbolic Links
If you want to change the OST file location from its default place, Symbolic Links can be utilized via the MKLINK command. It involves creating a symbolic link between the original & new paths.
To execute the process, follow the steps below:
Transfer the OST file from its default position to a different location.
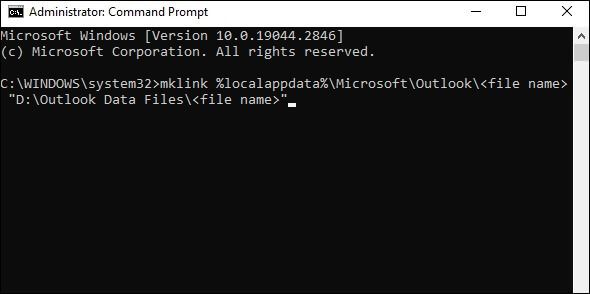
Launch the Command Prompt window with administrator credentials.
Type up the mklink command:
mklink %localappdata%\Microsoft\Outlook\<file name> “D:\Outlook Data Files\<file name>”
Upon executing the command accurately, the Symbolic Link is formed.
Why do you need not move the OST file to another computer?
If you are looking to use the Outlook application on another system, you need not move your OST file there. When you add your account to Outlook there and enable Cached Exchange Mode, a new OST file is created where you can get all your Outlook data.
Also, there is no need to keep backups for OST files, as Exchange can create them afresh. If Exchange Server crashes for any reason, you can recover your mailbox data and convert OST to PST file easily using professional Kernel for OST to PST tool.
In the blog, we highlighted the importance of locating OST files and provided manual solution to do so. All the methods are easy to execute even for. So, you can choose any of these methods at your convenience.
Moreover, in case you are looking to shift to PST data files, go for our recommended OST to PST converter. The software is reliable and helps in recovering the inaccessible data from corrupt or damaged OST files. It repairs all the errors present in the file and makes it accessible again. You can try the trial version of the software to check the credibility of the tool.


The instructions were well-explained and easy to follow, making it a smooth process to change the OST file location. I appreciated the inclusion of screenshots, which visually guided me through each step.
Very informative and helpful article provided by the writer. With the help of this article one can easily change the location of the OST files in MS Outlook. I have already used above mentioned method. It worked very smoothly. Thank you for helping us!
I used “Create a New Outlook Profile and Move Existing OST file to a New Location” method. It worked very well for me. Thank you very much for writing such a helpful article!
If you are looking for a solution to change OST file location, then this article can help you to do this task very easily. All the methods are very simple and provide accurate result. Thank you for writing such helpful article!
This is the excellent way to define the methods to change the location of Outlook OST file. I have used “disable the cached Exchange mode and configure a new location for the OST” method. I am pleased to inform you that, it worked very well for me. Thank you very much for helping me!
Very helpful post provided by you, it helped me to change the location of OST file. I also tried mentioning tool to move my OST file in various other formats. Thank you very much for the great help!
Thank you for information. It helped me to change the location of OST file successfully. Now, I would like to convert OST to PST file. But, I wished to have a freeware.
You can use this Converter software to convert OST to PST file. With a free trial version, you can easily convert and save 25 items from each OST folder free. If you want to save more OST file, then you should try a paid version.