


Read time 5 minutes
In the Hosted Exchange environment, both on-premises Exchange Server and Exchange Online coexist within the business organization. However, a trusted third-party service provider manages them and ensures the availability and security of cloud-based accounts. A well-prepared approach is essential if you wish to migrate specific mailboxes from Hosted Exchange to your Office 365 (Exchange Online) account. This involves preparing both the source and destination accounts and executing an IMAP migration in manageable batches.
The service provider is responsible for all the necessary preparations and the seamless execution of the entire migration process. Let us learn how to prepare these platforms using cmdlets and carry out the Hosted Exchange to Office 365 migration using the Exchange Admin Center.
Benefits of moving from Hosted Exchange to Office 365
Exchange Online is a cloud-based email platform that offers many benefits to users. Here is why you should plan to move your organization:
- Security: The built-in security features of Exchange Online, including anti-spam, anti-malware, and data encryption, provide enhanced security to the users.
- Economical: When your organization is in a hosted Exchange environment, you must ensure proper infrastructure, including servers, networks, etc. However, Exchange Online helps cut unnecessary costs by providing a cloud-based environment.
- Accessibility: With Exchange Online, users can access emails, contacts, calendars, etc., from anywhere with an efficient internet connection. This makes remote work extremely easy.
- Scalability: There is no effect on productivity even if the number of users and mailboxes increases with the increasing size of the organization.
- Integrated with Office Suite: Exchange Online provides easy connectivity to the MS Office suite, including SharePoint, Teams, and OneDrive. It makes team communication and collaboration more effective.
Here are the detailed steps –
- Create a new account for the migration and grant full access rights to each mailbox for the respective account. Run the PowerShell cmdlet.
Get-Mailbox -ResultSize unlimited | Add-MailboxPermission -AccessRights FullAccess -User <the user account name>
- Allow the impersonation right to the user as it is crucial for a large size migration. Run the cmdlet.
New-ManagementRoleAssignement -Role ApplicationImpersonation -User <username>
- Export the mailboxes to a CSV file.
Note: If you are an administrator, then you do not need to provide the password for every mailbox. But a non-administrator needs to provide both mailboxes and password in the CSV.
Here are the steps to prepare the destination end for smooth migration–
- Setup the user account to receive the mailboxes from Source.
- Create a new admin account with all the permission related to the mailbox.
Note: You need to create a new admin account because if the user is a part of the Domain Administrator, Schema Administrator, or Enterprise Administrator groups, then they cannot have any administrative rights for migration. There is a default security setting in Exchange Server which prevents such admin accounts from migration even if they have the required permission. - Create a new Exchange PowerShell session for the migration.
$s = New-PSSession -ConfigurationName Microsoft.Exchange -ConnectionUri https://ps.outlook.com/powershell -Credential $cred -Authentication Basic -AllowRedirection
- Grant the permission for migration with the following cmdlet:
Get-Mailbox -ResultSize Unlimited | Add-MailboxPermission -AccessRights FullAccess -Automapping $false -User <username>
- Disable the throttling for the Administrator account.
- Verify that Administrator account is accessible in EWS.
- During migration, if the attachment along with the messages is larger than 10 MB, you need to change some limit settings in the destination mailboxes – increase maximum message size limit, maximum accepted content length, maximum receive message size, and maximum accepted request length.
The Exchange Online administrator has the to initiate email migrations using the Email Migration wizard, conveniently accessible within the Exchange Admin Center. This empowered administrator can efficiently manage multiple migration batches, maintaining precise control over the migration process. Moreover, the administrator can simultaneously execute multiple migration batches, ensuring that each batch operates independently, without compromising overall migration efficiency.
Here is the process to create the migration batches using the E-mail migration wizard:
- Sign in to Office 365 with administrator credentials (https://portal.office.com)
- Go to Admin option, and click the Exchange option.
- Click the Migration option, and go to select the New (+), and choose the option Onboarding.
- Select Remote Move from the options (other options include Staged Migration, Cutover Migration, IMAP Migration, etc.
- Select the users to account by clicking the Add (+)
- Input the hosted Exchange Administrator account Enter the username as ‘domain name/Administrator.’
- Create the Migration Endpoint and then create the Migration batch with a new name.
- Input the destination domain and target credentials.
- Start the batch migration. After a successful migration, you can verify the mailboxes present at the on-premises Exchange Server mailboxes.
While running the Migration batch, if you want to have a deep knowledge about the migration status of a large sized batch, then you should go to Exchange Management shell and run some cmdlets to get the status.
- Get-MigrationBatch -Identity ‘BatchName’: The cmdlet will bring the complete details of the migration batch with the status of the mailboxes.
- Get-MigrationConfig -Partition: With the help of the cmdlet, you will be able to easily get the batch settings that you have configured for the batch.
- Get-MigrationStatistics: Run the cmdlet with the suitable parameters like Diagnostic, DiagnosticInfo, DomainController, Partition, and you will get the required details and the health of the ongoing batch migration quickly.
- Get-MigrationUser -Identity ‘User-name’: Run the command to get the migration status of the given user. It will show whether the user was migrated in the batch migration or not.
- Get-MigrationUserStatistics – Identity ‘User-Name’: To get deep understanding of the migration user data, you should run the command along with other parameters and get the result.
- Get-MigrationBatch: The simple cmdlet will give details of the migration batch like total number of mailboxes being migrated, number of successfully completed migration, migration error, status of migration batch, date and time of the migration and when it was completed.
- Requires making multiple at Source and destination ends as well.
- One negligence or a minor error can cause a huge mess.
- Time taking process.
- Needs good understanding of Exchange environment and its related terms.
- Require manual initiation of the migration batch within EAC.
Alternatively, you can opt for a batch migration of Exchange mailboxes facilitated by a CSV file. This approach demands a considerable amount of time to execute, and a solitary error or negligence could potentially derail the entire migration endeavor, possibly leading to data corruption.
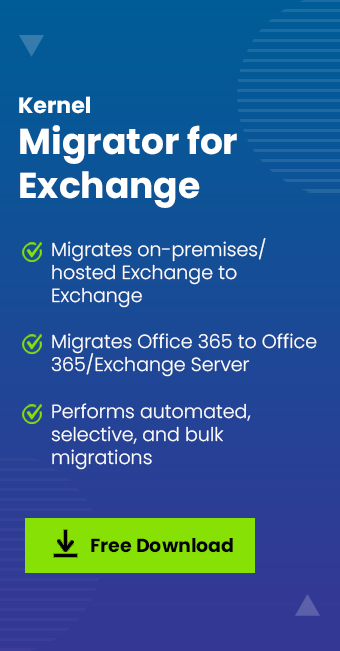
To safeguard against such unfavorable circumstances, employing a reputable third-party Exchange Migration application from a trusted vendor with professional expertise is advisable. Kernel Migration for Exchange comes with several advanced features and a user-friendly interface, which reduces the challenges related to data transfer and provides a detailed report for each migrated item.
Final words
This article explains how to migrate from Hosted Exchange to Office 365 (Exchange Online) using a well-prepared approach. The choice of migration methods decides whether the result will be a seamless move or end up being chaos with potential data loss. Using Kernel Migration for Exchange can help to escape the hassle involved in manual methods of migration can be used to move their mailboxes. It can help you transfer mailbox database (features, information, and metadata) from any Exchange version to Office 365 tenant.
Thank you for the assistance and recommendation. I really look forward to the Exchange to Office 365 migration. Just tried its trial version and that’s fine, its filter option is perfect. Just like the way the support team responds.