Summary: Moving subsites in SharePoint demands a well-crafted strategy and is crucial for maintaining an organized digital workspace. Our blog offers expert insights and technical guidance into the importance and relevance of this process. For a simple transition, consider the Kernel Migration for SharePoint tool—a reliable solution ensuring secure and swift subsite relocation. Elevate your SharePoint experience with our best practices and the power-packed capabilities of Migration.
Ever wondered about the best way to move subsites in SharePoint? Sure, there’s a manual method using the SharePoint admin center, but here’s the deal—it’s limited. This approach only moves sites within your site collection. But we have got all the solutions for you.
Our blog is your guide, offering not just the how-to on this manual move but also giving you some top PowerShell commands. No tech jargon, just simple steps to get your subsites where they need to be. Without any delay, let us get to the method now.
Manual method to move subsites to another site in SharePoint
Move subsites to another site in SharePoint, Here is how you can move subsites to another SharePoint subsites:
Login to SharePoint using the Administrative credentials.
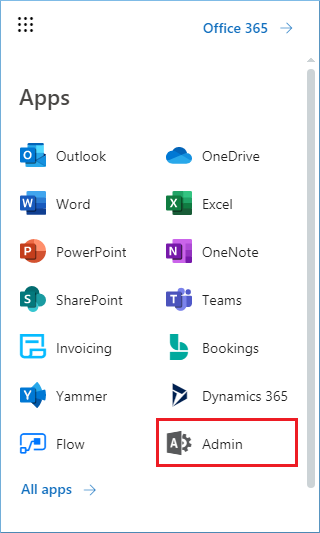
Click the Admin icon.
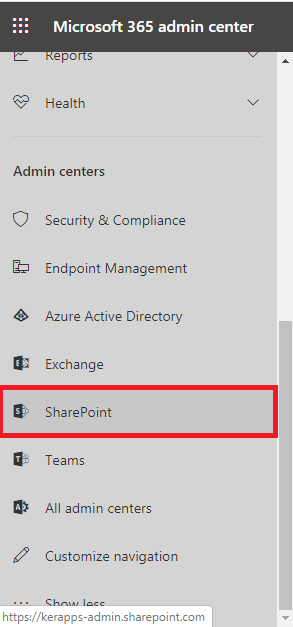
Go to Admin centers section and select SharePoint.
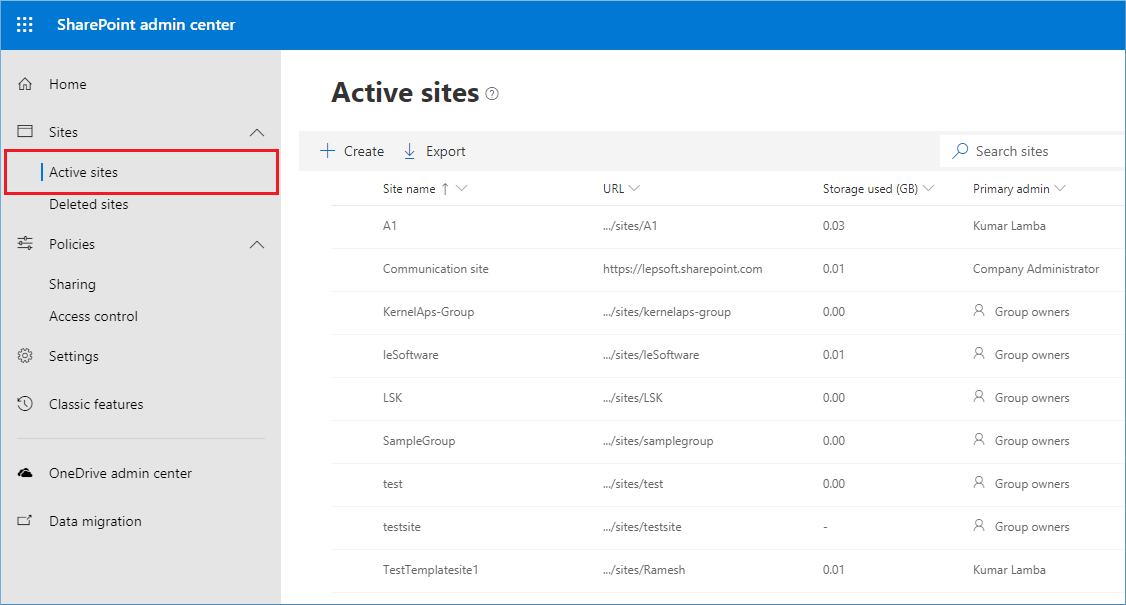
In the SharePoint Admin Center, go to Active Sites. It will enlist all the active sites in your account. You can click the URL of any site which you want to move to another site.
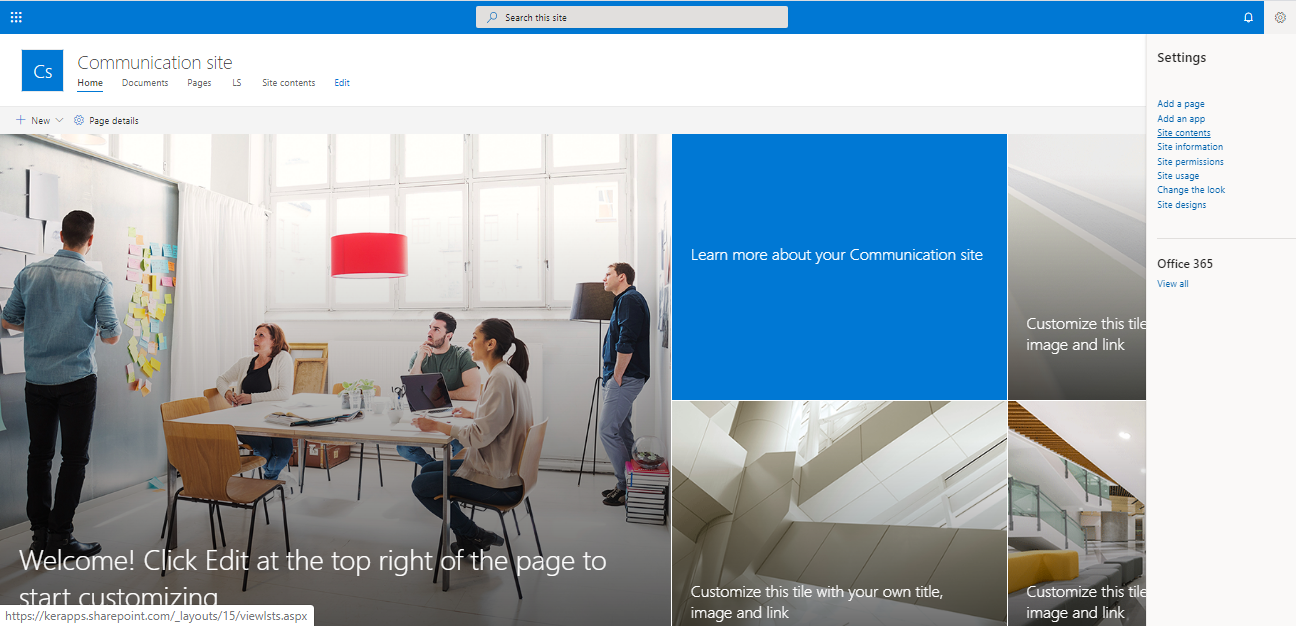
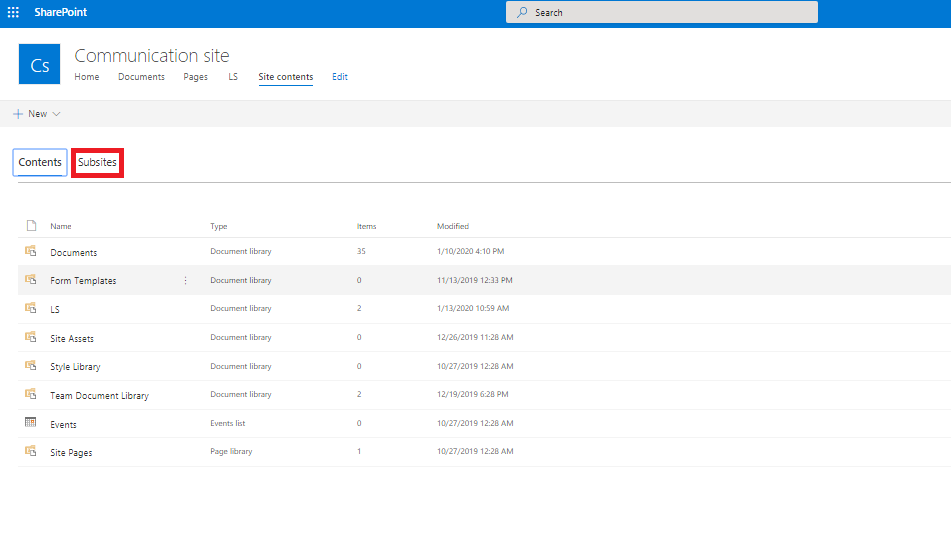
Go to Settings option after opening the site. Click the Site contents.
The site contents present the Contents and subsites of the current site. Go to Subsites section.
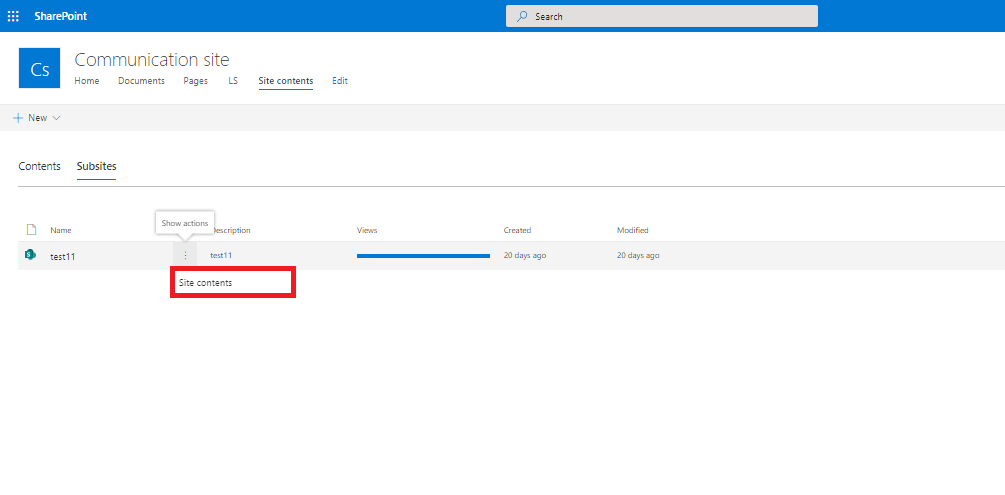
At the Subsites section, click the Show actions icon and select Site Contents.
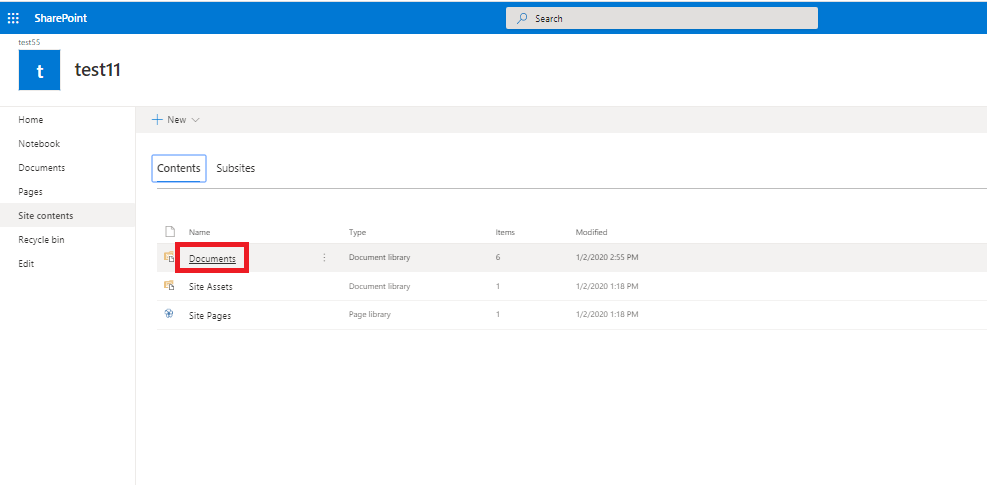
Select the content of the site by double-clicking it.
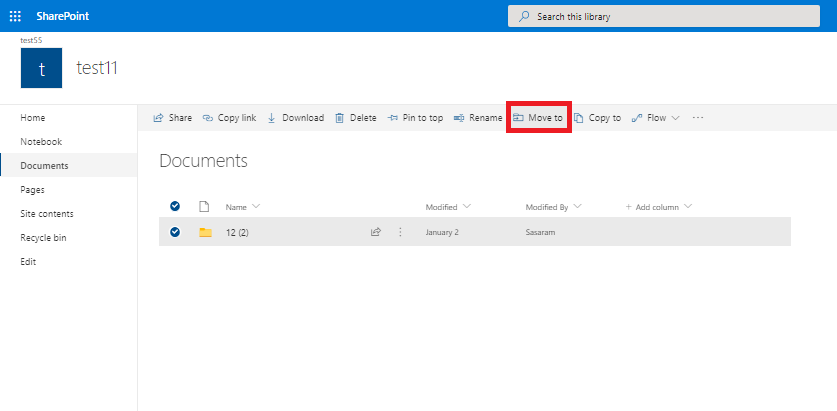
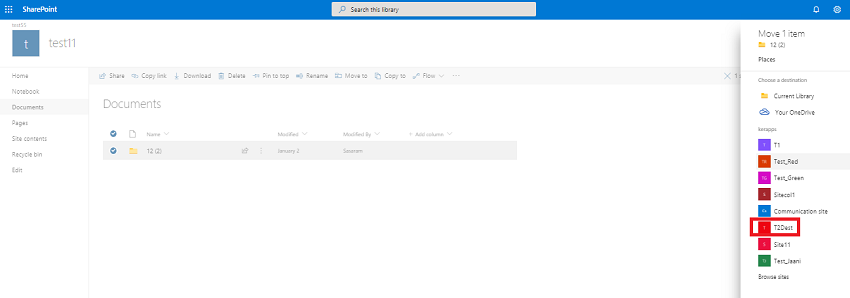
Select any folder or item and click the ‘Move to’ option.
Select any site (TestSub1) from the list at the destination for the respective content.
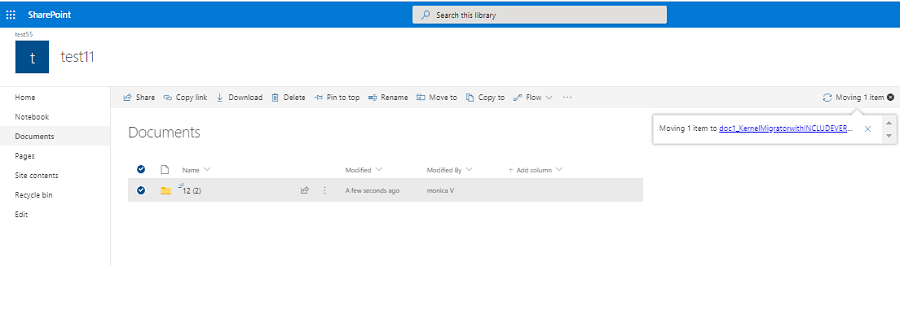
The content is moving to the site.
Finally, the status of the progress changes to Done after successfully putting the data at the site. You can go to TestSub1 site and check the f1 folder present there.
NOTE: You can complete the method only when the publishing feature is enabled in SharePoint.
The above method is direct migration of a site/subsite to another site. But there is another method where you can save the site as a template and later use the template at any other site.
Save the SharePoint site as a template
Go to Active Sites list, select any site, and click Site Settings.
Choose the Save site as a template under Site Actions.
Provide a proper name to the new template file at the File name text box.
Mention a Template name and Template Description.
Check the box Include Content to add all the content of the site in the template.
Click OK button to save the template.
Using PowerShell to move subsites to another site in SharePoint
Below we have given a simple command line that you can use to move subsites to another site in SharePoint. Read below.
#Connect to PnP Online
Connect-PnPOnline -Url $SiteURL -Interactive
#Get the Web
$Web = Get-PnPWeb
#Move the site to New URL by Setting relative URL
$Web.ServerRelativeUrl = $NewSiteURL
$Web.Update()
Invoke-PnPQuery
This moves the subsite under https://kernel.sharepoint.com/sites/writing/us/2022 to https://kernel.sharepoint.com/sites/writing/2022.
Note: You can only use this method within a site collection. You must use top third party migration tools to copy or move a subsite to another site collection.
Upload the site template
Click the Site Settings.
Go to Web Designer Galleries and click Solutions.
Click Upload in the commands group, then click Browse button at the Add a Document dialog box.
Locate the template file, then click Open, and then click OK.
Click Activate option to enable the template in the Commands group.
Advantages of template in SharePoint
The template removes the need to enable the publishing feature at the SharePoint.
You can move the template at different site collection.
Disadvantages of template in SharePoint
The maximum size of a site template cannot be more than 50 MB. So, if the size of the site is more than 50 MB, then you cannot create a template of the site.
It is suitable for smaller sites only.
Final words
The method to move subsites to another site, and the option to create a template within the SharePoint is quite complex. If you want to achieve a far greater control at the site movement, then you should use Kernel Migration for SharePoint. This SharePoint Migration tool can perform a migration between all versions of SharePoint, File Server to SharePoint, One Drive to One Drive, Public Folder to SharePoint, and Google Drive to Google Drive. Simply, you can easily migrate the data any desired destination.
 |
Updated On - December 04, 2023
|
Updated On - December 04, 2023


The mentioned steps helped me to easily move the Subsites to another platform without any kind of difficulty. Thank you to the team for such a wonderful blog.
Or you can use the Site Manager and move entier sites with the GUI by going to yoursite/_layouts/15/sitemanager.aspx