Read time 8 minutes
In recognizing the essential need for PST file imports, Microsoft offers two distinct methods: Drive Shipping and Network Upload Method, each designed to streamline the process of transferring PST files into Office 365. Furthermore, numerous professional tools are available to facilitate this operation. Nevertheless, importing PST files into Office 365 can prove intricate if the correct approach isn’t followed. In this discussion, we will delve into both manual techniques and a professional method to ensure a seamless upload of PST files to Office 365.
Implementing both methods can be somewhat intricate. Of the two, the Network Upload method stands out as the preferred choice for many organizations when it comes to importing PST data into Office 365.
In this section, we will delve into the Network Upload method for importing PST files into Office 365 mailboxes. However, before we dive into the details of this method, let’s first underscore some key prerequisites to successfully execute this process.
Now, let’s move to the working process of the Network Upload method to import PST files to Office 365 mailboxes.
The Network Upload method consists of several sequential steps, each with a distinct role in importing PST files into the cloud. These steps include:
Note: *The first step will be performed only once to import PST files to Office 365 mailboxes. After that, you have to perform Step 2 to Step 6 every time you want to import PST mailboxes to Office 365.
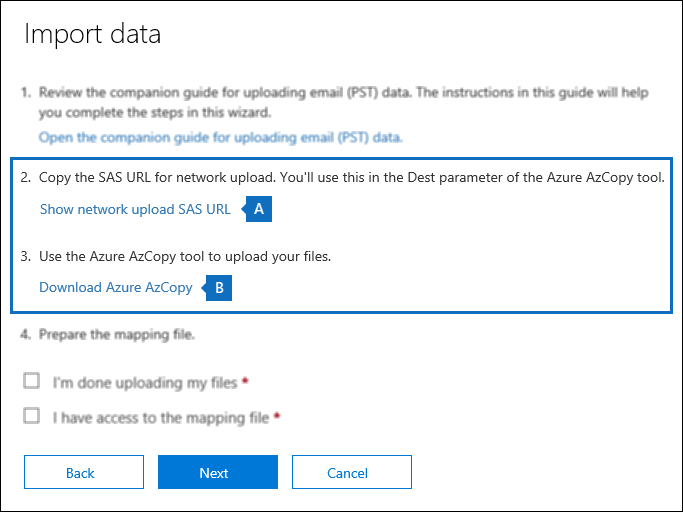
First, download and install the Azure AzCopy tool on your system, as it will be used in the next step for PST file uploads. Additionally, ensure you have copied the SAS URL specific to your organization.
Note: The SAS URL is a fusion of the network URL for the Azure storage location and a Shared Access Signature (SAS) key. This SAS key grants the necessary permissions for importing PST files to the Azure storage location.
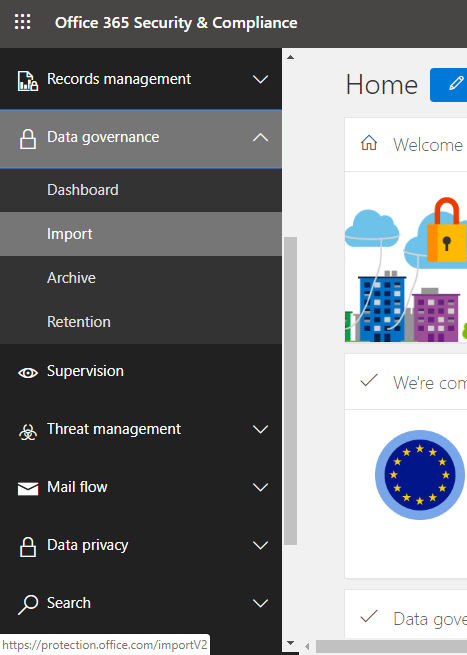
To download and install the Azure AzCopy tool and copy the SAS URL, follow these steps:


Next, utilize the Azure AzCopy tool to upload PST files to your Azure storage location in the Microsoft cloud. Follow these steps:
Parameters are used to define the command. For instance, ‘Source’ indicates the source directory where the PST file is stored, while ‘Dest’ refers to the SAS URL obtained in Step 1, and so forth.
To view the list of uploaded PST files in the Azure blob, you can utilize the open-source Microsoft Azure Storage Explorer tool.
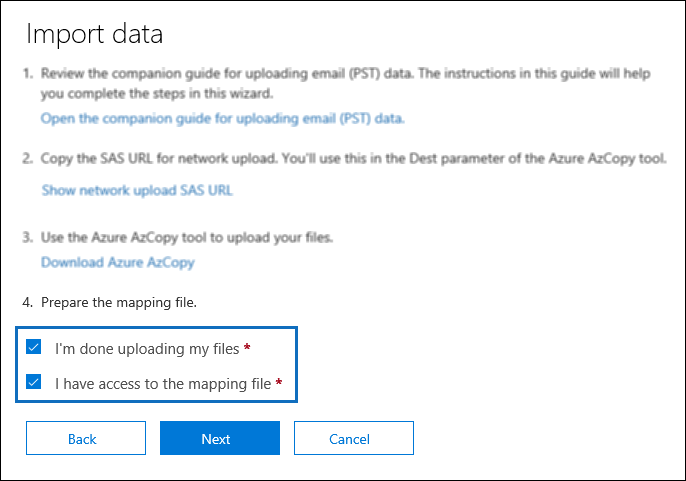
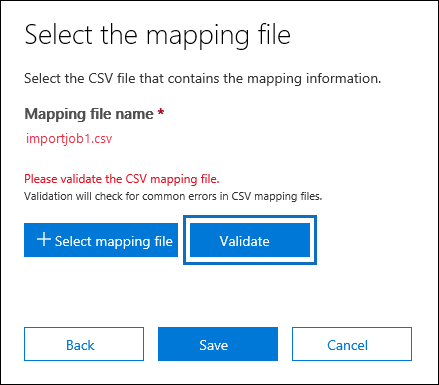
After uploading the PST file to Azure storage, you must create a CSV file to designate the user mailboxes for PST file imports. This CSV file will be submitted when creating a PST import job. Follow these steps to create a PST import mapping file:
Note: A CSV file must include the following parameters:
Workload,FilePath,Name,Mailbox,IsArchive,TargetRootFolder,ContentCodePage,SPFileContainer,SPManifestContainer,SPSiteUrl
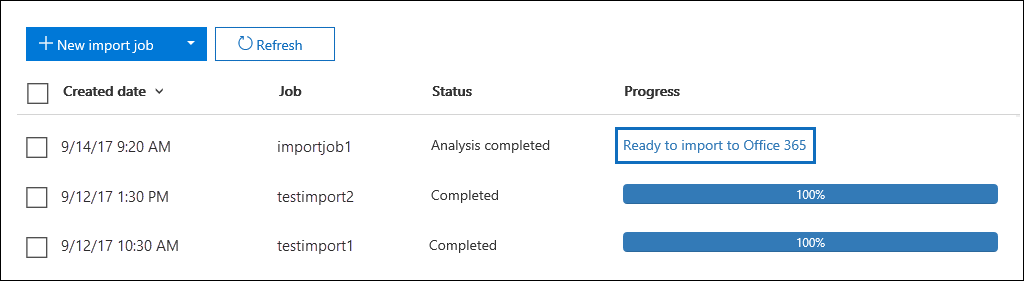
Once you’ve created the mapping file, proceed to create a PST Import job in Office 365. Follow the same steps outlined in Step 1 for creating a PST Import job. When the ‘Import Data’ page appears, follow the steps illustrated in the images below and click ‘Next’.
When the data is ready for import, you can choose whether to import the entire dataset or apply specific filters to refine the data. Follow these steps to make your selection:
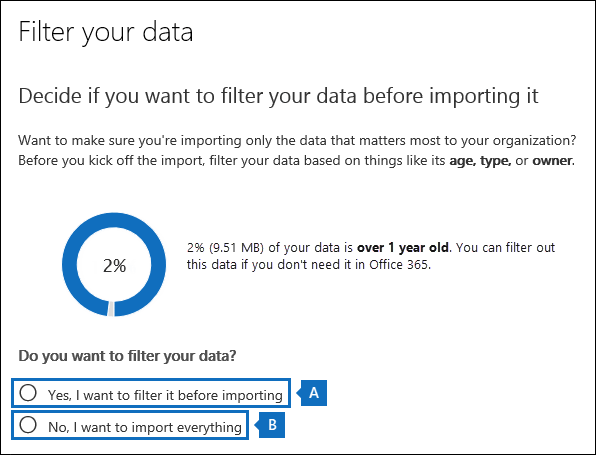
All your PST files will be imported to Office 365 mailboxes; you check the files by opening Office 365 account.
While Network Upload is a valuable technique for uploading PST files to Office 365, it can be quite complex, especially for beginners. As an alternative, consider using the Kernel Import PST to Office 365 tool. This software offers a more user-friendly approach to importing PST files into Office 365, featuring advanced filters and functionalities that enable you to tailor the import process to your specific needs.


The network download method is much better than the drive shipment method. Therefore, thank you for describing this process in depth. It enables me to transfer a large amount of data from PST to Office 365. But your tool is more powerful because it easily uploaded large files in a short time.